A guide to creating the best looking line art in print in the new digital print world
Part 6
Straightening & Scripting
This is the sixth installment of Paper to Pixel to Paper Again, a series that explains (in an overly thorough manner) the how-to's of preparing line art (and later in the series, color art!) for print.
If you haven't done so yet, please go back and read the previous installments.
***
![]()
![]()
![]()
![]()
![]()
![]()
![]()
![]()
In our last installment, we scanned your masterpiece (1200 pixels per inch [ppi] for your at-size sources of art, 600 ppi for your very large original artwork that will be reduced for print). Then we discussed some general principles of file organization, and how not to get lost in a digital maze of files.
Today we'll use Photoshop to take your raw scan, and generate an "Action" that can do the first stages of page work for your entire book.
I've said it before, but computers do a few things much better than human beings. One of those virtues—carrying out complex commands unerringly, for an unlimited amount of repetitions. If there is a task you will need to do more than once, you should consider making an action or script for it, and saving it to run the next time the issue arises. Something that saves you even a minute per page ends up saving you ten hours (!) over the course of a 600 page book. So use your time wisely.
A paragraph on Adobe Creative Cloud—Adobe is a great software manufacturer who makes an invaluable suite of graphics products, all of which are available simultaneously under a reasonably affordable subscription plan. They also strike a good balance between continually updating their products, and not pulling the rug out from under us oldsters who are used to something functioning in a certain way. I'm going to use Adobe products, namely Lightroom and Photoshop and Indesign, for these demonstrations, because it's what I know; but the basic principles could be carried out with any well-designed graphics program. These just happen to be the best I know.
One Last Prep Before We Go
Okay, remember what I said about saving time through automation?
Let's add an extra step before we tackle these scans.
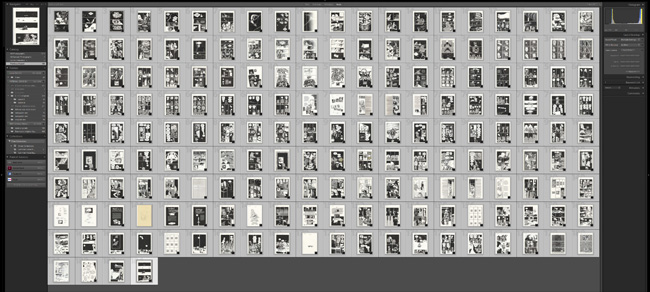
I've opened up the Adobe program Lightroom, a very smartly-designed piece of software that is the virtual-world equivalent of a photographic development room. You can open up a session or folder of photographs (or scanned images) and treat them as a catalogue—change them, individually or as a group, by re-exposing, rotating, sharpening, adjusting the color, and then A/B comparing the result, or A/B comparing individual images. It's a very deep program, but here we're going to use if for something very shallow. We're going to open up every image in our scans folder for our new book, and rotate them to be perfectly aligned, and then save the whole lot in a new folder.
(But didn't you scan them perfectly aligned? Well, maybe. Maybe if your art board was machine-cut and thus perfectly rectangular, and you drew your panel borders with a t-square perfectly flush with your perfectly-manufactured drawing desk, and then you took this object of 90-degree majesty and placed one edge faultlessly butted up against the raised edge of your scanner. And then did this again on every page.) (So yeah, you might want to rotate a few images, if only a bit.)
Okay. So once you have your catalog open in Lightroom, double-click one of the images to get started.
Since we're not going to be doing very much here, this part is pretty straightforward. Hitting the "R" key brings up the Crop interface. You can now trim the sides, and rotate, and a helpful guide pops up that will help you keep everything aligned. Hit "Enter" when you're satisfied. Because Lightroom is a non-destructive editing program, meaning your original data stays in its own folder intact while you work, you don't have to worry about making a mistake. If you want to change what you've done, just hit "R" again and re-crop, and then hit the right arrow key to move on.
You might be tempted to make other adjustments here, and in another workflow, that might make sense—but for now, just power through and rotate all your images. After you're done, go to File -> Export, and take a look at your options. You want to save them in a new folder nearby your raw scans, with the same file type and bit depth as the originals, with nothing added.
By the way, if you're very fastidious in your scanning, you might be able to skip this step in the future. Very few of Sandeep's scans, for instance, need rotation, as he takes his time getting the alignment great on his end before scanning. Which is hopefully how it is for you as well! I just find this step useful because it allows me to automate an entire stage of my work, and know for sure that I won't have to redo any of it because something needs rotation after the fact. An alternative might be to skip this stage and just make note as you work of what pages need rotation, and attend to them separately. Something I might try on the next book.
CAN WE START NOW??? PLEASE???!!!
Sure!
Fire up... the PHOTOSHOPS!
Fire up... the PHOTOSHOPS!

I like to imagine it making the old 2400 bps modem handshake sound as it loads...
Nahanananah... nahanahanaha... nahanahanaha... beeeeeeeeeeeee!
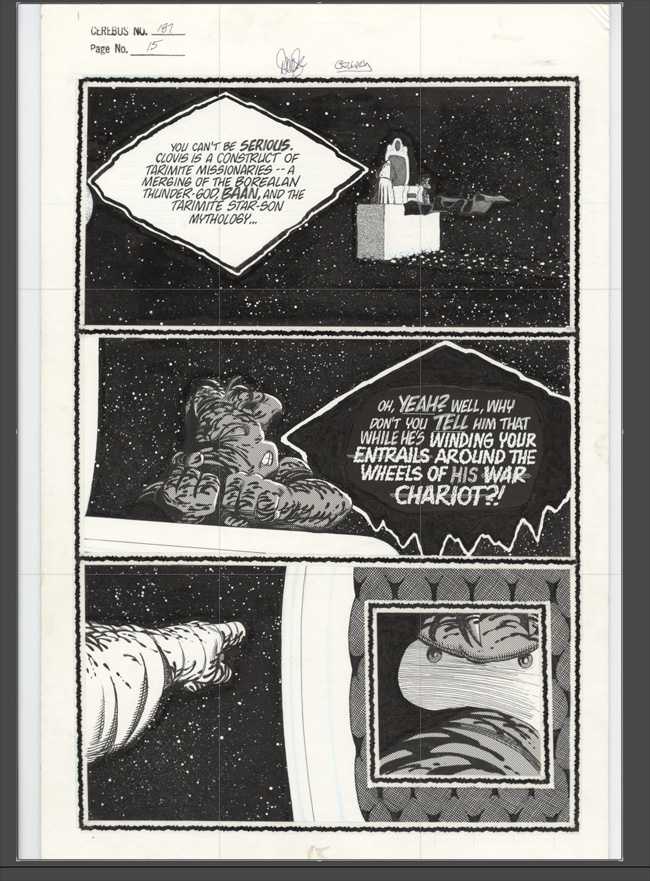
Okay, now open a few sample pages from your scans. If your artwork has a wide amount of variation to the techniques used, say, some pages composed of only really dense teeny tiny lines, other pages with loads of fine screen tone, some others with spray/airbrush/toothbrush work or some other kind of similar spatter, then make sure each type is represented in your samples. Now start with a page that represents a kind of average for the project. Average complexity, average amount of density (darkness) to the black, something to establish a baseline for the work.
I'll be starting with issue 190 page 18. It's a good representative sample of the book — areas of fine line, two different densities of circular tone, "noise" tone, and some photocopied panels with weak blacks (the backgrounds of the latter two panels are enlargements of the first).
Now we're going to make an action out of the next steps we take, so we can repeat it on other pages. Go to Window -> Actions to bring up the Actions panel. At the bottom of the panel is a button that is called "Create New Action." Click on this, and you'll be prompted to name your action and what set you'd like to save it to.

I've named mine "original test."
Once you hit Record, everything you ask Photoshop to do will be recorded as part of your script. So if you're planning on experimenting a bunch and undoing a bunch of commands, you might need to go back in and clean up your script a bit before being finished, or stop and start it (using the buttons at the bottom of the Actions panel) as you go to ensure "testing" items don't get recorded in your script and slow it down when you run it.
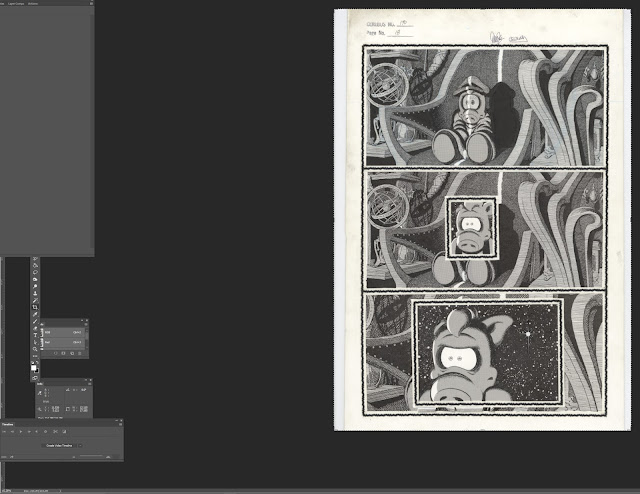
Okay, now that we're recording our Action, the first thing to do is make our color scan grayscale, in the best method possible. Because the original art I'm working with was produced with "non-repro-blue" pencil, this will involve throwing out the blue color channels.
So go to Window -> Channels, if your Channels window isn't already visible.
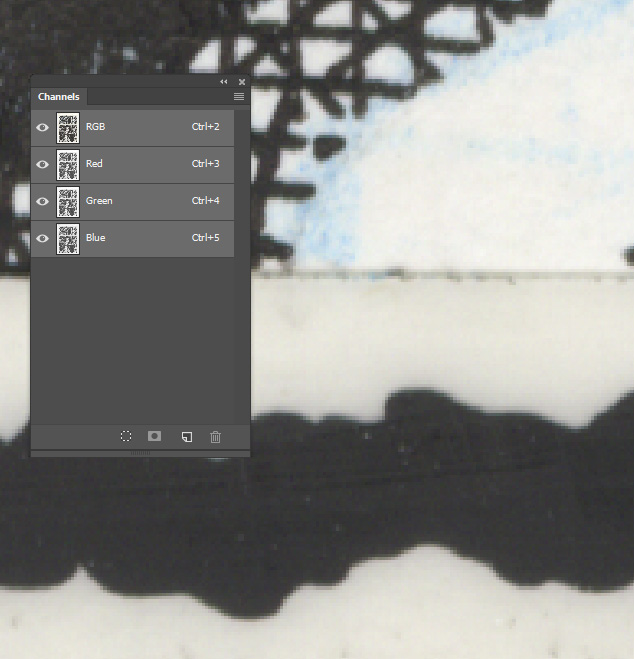
The "Channels" window next to some visible blue-line pencil.
Now, depending on the brand of the blue line pencil used, and the color cast of the scans, the channel you need to throw out might vary. Click through each of the channels, which will display, in grayscale, the information available solely on that channel. Observe which has the most amount of the pencil visible. In this case, the Red channel is the biggest offender, so I dragged that channel to the little trash icon at the bottom of the panel. Which leaves us with just the Magenta and Yellow channels remaining. Of these, the Yellow channel is the clear winner, so I toss the Magenta channel.
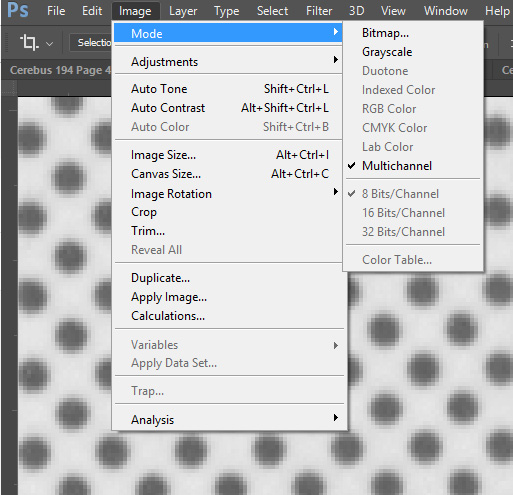
Now that we've selected the very best channel, we're ready to do what we actually set out to do in the first place— make our document grayscale. Go to Image -> Mode -> Grayscale to finish the job.
Now go to your Actions panel and hit the Stop button to stop recording your script. Do you have a bunch of nonsense/unhelpful steps in your script so far? Either try the whole thing again, or delete the unneccesary steps by selecting them (SHIFT- select will select a sequence) and dragging them to the trash icon below.
... and that's it for this week! Next week— we SHARPEN STUFF. People ARGUE WITH ME IN THE COMMENTS. WE SPIT BLOOD.
Well, probably not. But I'm keeping the possibility open!
(To download the top portion of the page I'm working with here, click this link and then click on "full res version," then the download button. Then feel free to follow along!)
Sean Michael Robinson is a writer, artist, and musician. See more at LivingtheLine.com.